We have all seen those websites with the beautiful buttons on the sidebar that help you navigate the site and the services provided. Today, we will learn the step-by-step process of designing and inserting these custom sidebar buttons on your website.
We will be using a design tool that I have used for several months now called Snappa.
Snappa is great for many things including:
- Creating Images with Perfect Dimensions for any use (Custom sizes for different Social Media platforms)
- Editing graphics with the power of a complete photo-editing toolbox
- Access to +50,000 images, graphics, and fonts all royalty-free and open for commercial modification and reuse (CC0)
- Designing digital content from their fully-equipped library of templates.
- Ability to access custom colors and upload custom fonts allow you to develop content that fits perfectly with your brand and its style.
For my Custom Free Blog Image Checklist – Click Here!
With that, let’s get started with a quick tutorial.
Step One – Brand Your Content
I put this in step one because often we get excited and want to jump into the design (different colors, styles, and fonts) and that’s great! But in order to save time and streamline the design process, we must create a mental picture of what we want (maybe even draw it out on paper before we try creating it on the computer).
To complete this step, you will want to have the following decided and thought out:
- Color Palette for your brand (If you need some inspiration – Coolors is a great site to help with color selection. [Make sure you write down the Hex Color values so that you can use them in your designs]
- Fonts for your brand (Many of us use fonts that are common in many font libraries, but you may want to find something that is just a bit more… YOU. You can find custom font files [.TTF/.OTF/.WOFF] online and upload them for use in the Snappa library.)
- Stick to only a couple fonts – too many will distract from your brand.
- A quick design layout for your buttons (You don’t need to know everything at this point, but the more you have planned the smoother the graphics design process will go)
Step Two – Design The Button Template
By designing the sidebar button template first, you can ensure that they will all be the same style and look great on your site.
There are several considerations you need to make when creating the button template in Snappa:
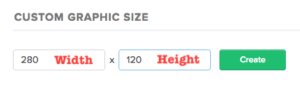
- Size of the Button (The width of your button will heavily depend on the width of your sidebar [mine is approx. 280 px.]; the height of the button will depend on your unique design)
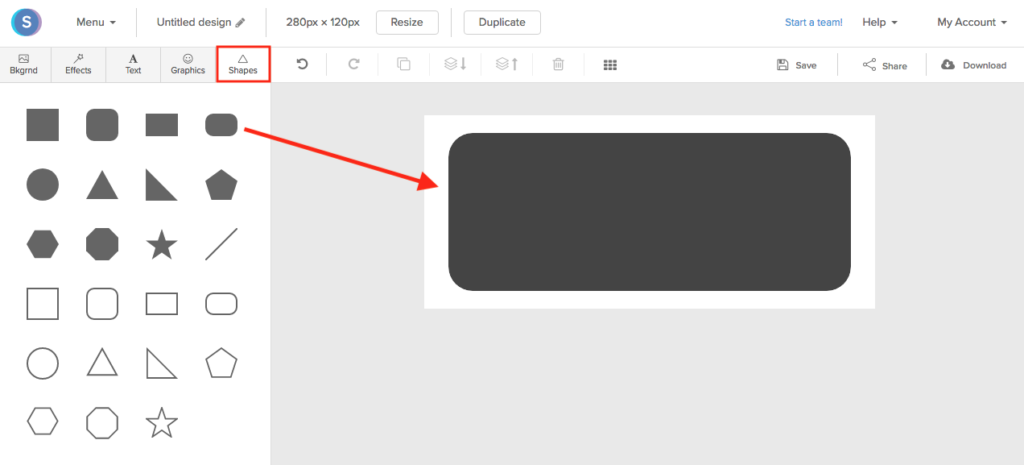
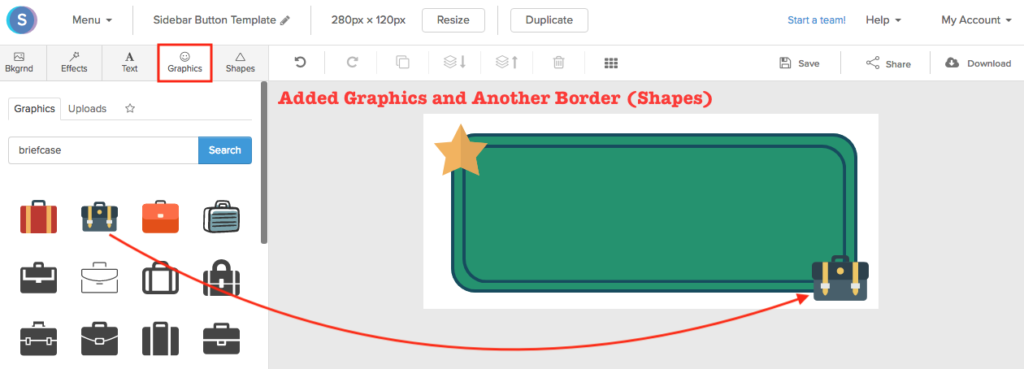
- The shape of the button (With Snappa, you can create images with transparent backgrounds allowing for unique shapes for buttons other than the typical rectangle [circle, triangle, star, and curved rectangle are all options]
- To pick your shape, place a solid shape centered on your workspace on Snappa (From the Shapes tab)
- The pattern or design of your button template (Make this unique but keep it simple, anything too flashy can take away from the ultimate goal – Site Navigation)
- When considering the design and color of the button, make sure it will complement your website, not take away from it or clash with it.
When you are finished designing your button template, save it so that you can use it to make all of your custom sidebar buttons!
Step Three – Create Unique Buttons
Now that you have the template for your buttons designed and saved, it’s time to make them unique to direct your readers to different parts of your site or to give them special information (in the style of your custom sidebar buttons).
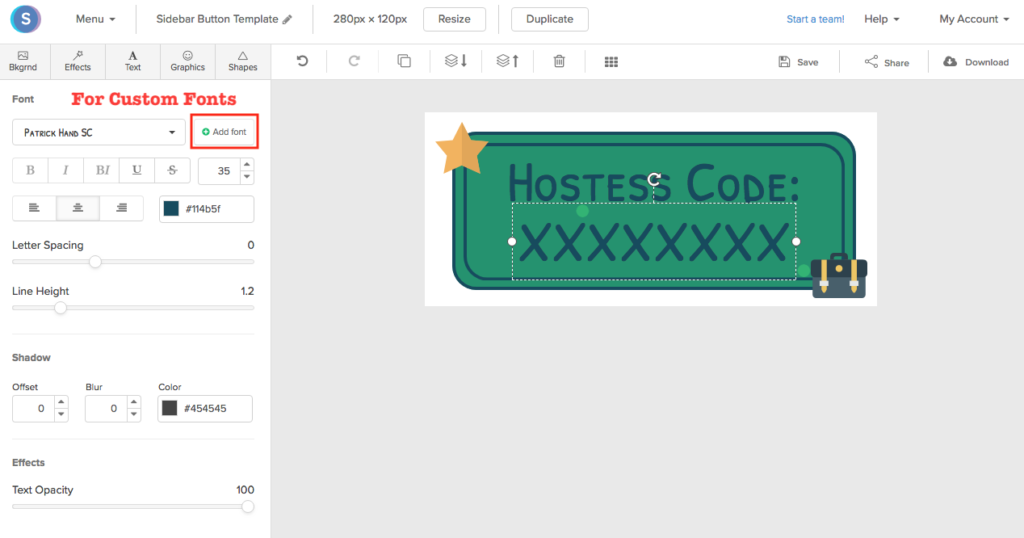
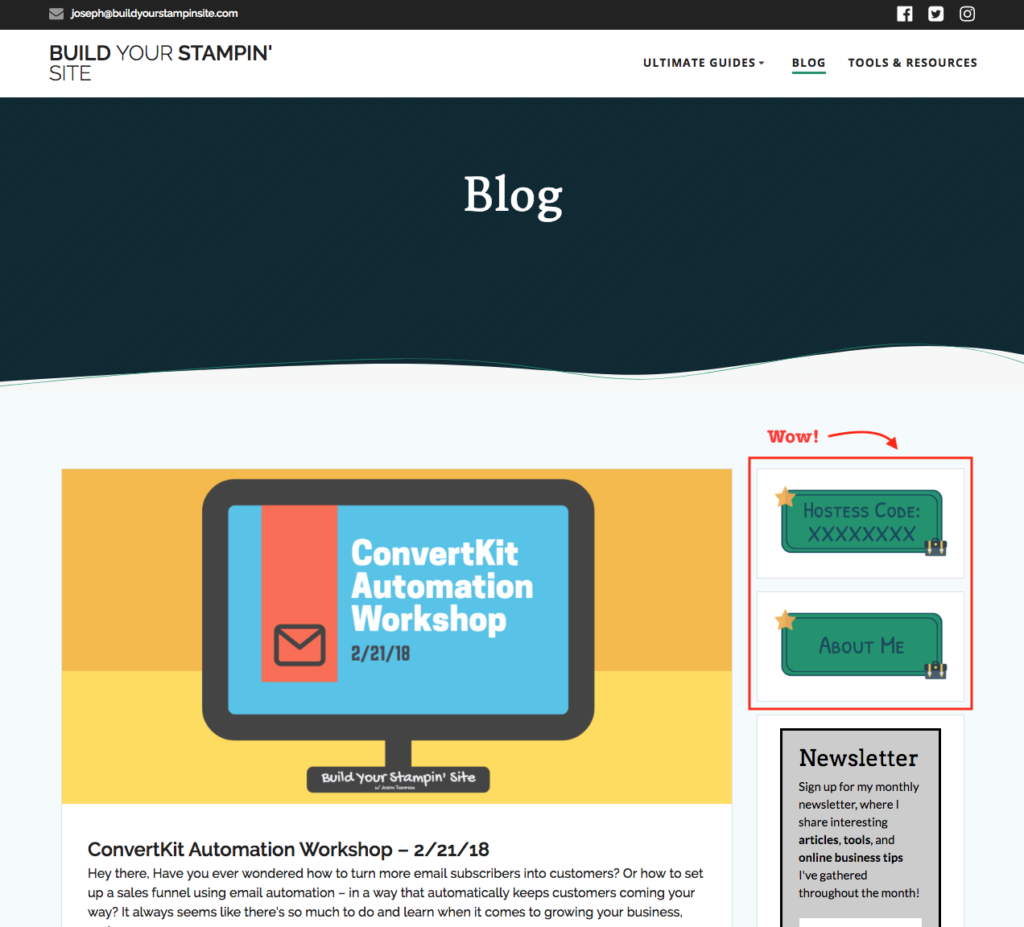
Here we will make two different buttons – An About Me button and a Hostess Code Button. Using the same font we can write on each of our buttons the information or label desired.
![]()
When you download your completed buttons, make sure to download them with a “transparent background”. This will ensure that your custom sidebar button retains the shape you designed and doesn’t have the white box around it.
This setting forces you to choose between the two resolutions of .PNG files and no longer allows for .JPEG files which will have a solid white background.
Note: If using a custom font, make sure to upload it to Snappa in order to be able to utilize it for your button theme.
Now that you have your custom buttons downloaded. We can move on to the final step.
Step Four – Inserting Custom Buttons on Website
In this step, I will be showing you how to create sidebar widget buttons with your own photos, and how you can make them useful to your readers!
- Go to your Widgets Menu [WordPress Dashboard -> Appearance -> Widgets]
- Drag the Image block to your “Sidebar Widget Area”
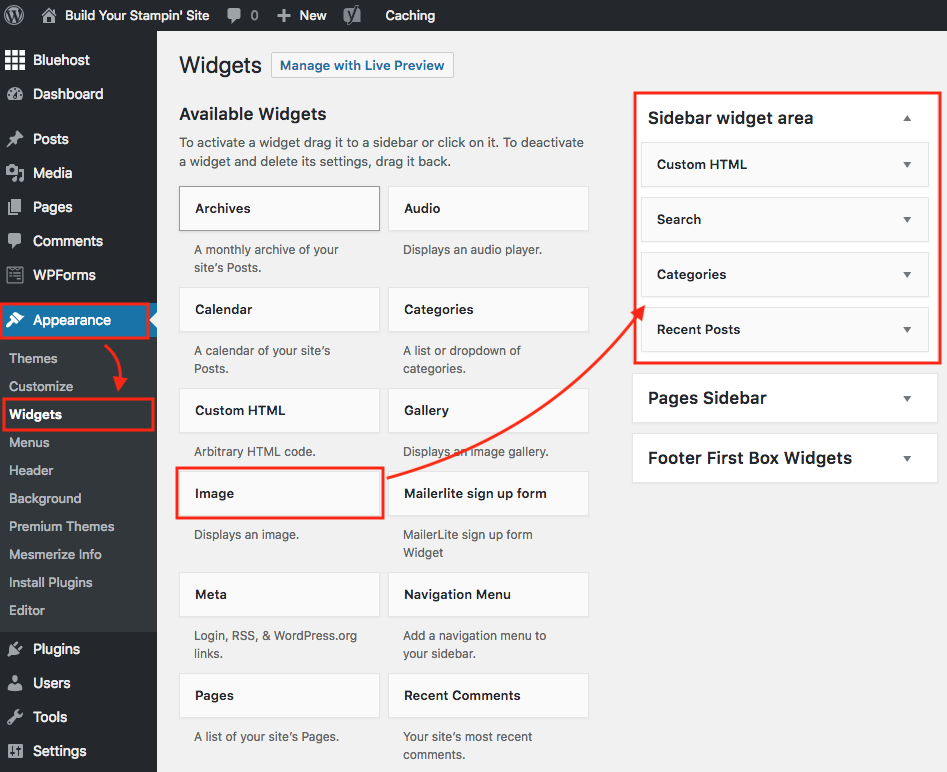
- Import the button images (.png files) to WordPress
- Edit widget settings to give function to buttons
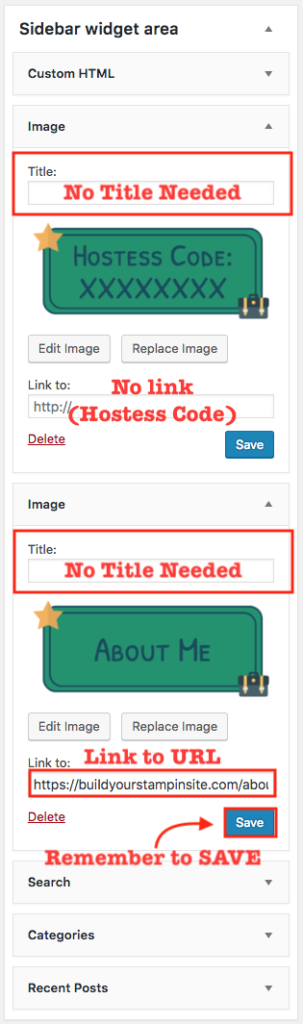
- No Titles needed for the buttons (they are already self-explanatory)
- For “Link to:” make sure the buttons you want to go to a link have a URL in the settings. (If it is informative, like a Hostess Code or other information, no need for a URL)
- Save all changes to your images.
Now you have it! Custom sidebar buttons you can use to navigate readers to the most important content from your sidebar. (Not to mention they are pretty stylish, too!) The final product is a website with eye-catching buttons on your sidebar to guide the readers to other content you offer.
For information like this and even more, check out the following sources:
Build your Stampin’ Site Facebook Community
Please note: Some of the links on this page are affiliate links – meaning that if you signup and begin using the product, Build Your Stampin’ Site will receive a small commission at no additional cost to you. I am a paying user of the products and only recommend products I truly believe will be helpful for my readers.
2 Responses
Thank you for covering Snappa! I will definitely test it as soon as possible.
Not easy to find the easiest tool to create graphics for a beginner (like me). I tried Canva but even if it seems to be the oldest player in the market, it was not that easy for me to get started at all. I also discovered Pixelixe Studio ( https://studio.pixelixe.com ) and was starting using it weekly, it seems to have less templates than Snappa or Canva but I really appreciated I didn’t had to signin to use it. It is directly in my browser favs. I will be glad to get some feedback about it as well if you already tried.
Thanks again
We love to use Snappa, glad you found the information here helpful! Thanks for your feedback. If I can be of any assistance to you, just reach out, I’d love to help.
Comments are closed.